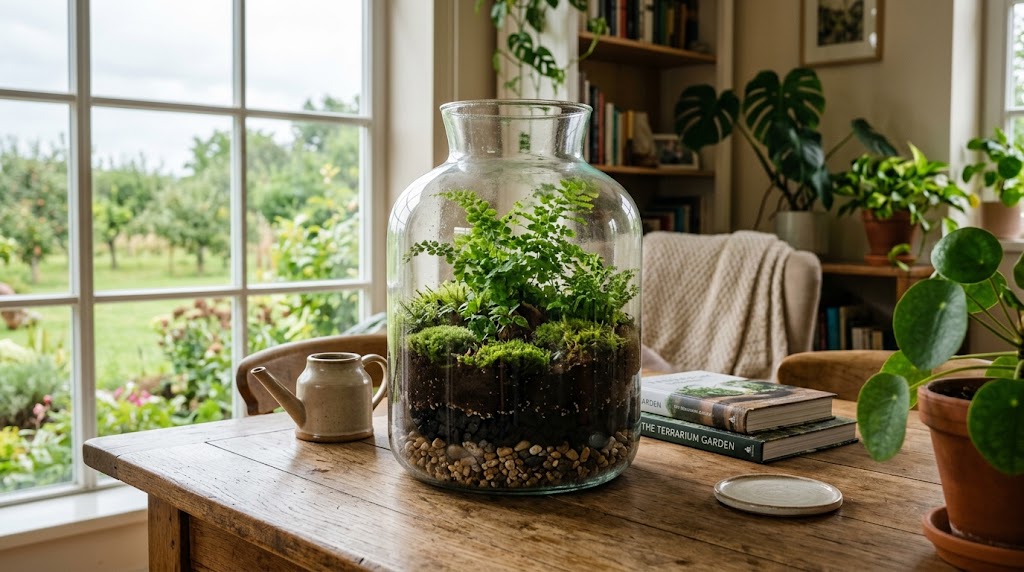
Learning how to build a terrarium is one of the most satisfying small projects a plant lover can take on — a self-contained little world of moss, tiny plants, and glass that looks beautiful on a shelf and needs almost no daily attention once it’s set up correctly. The trick is getting the layers and plant choices right from the start, since a terrarium built the wrong way can trap too much moisture and rot within weeks.
Here’s exactly how to build one that actually lasts, step by step.
Quick Answer
To build a terrarium, layer 1-2 inches of gravel for drainage, a thin layer of activated charcoal to control odor and bacteria, then 1-4 inches of well-draining potting soil. Add small, slow-growing plants with similar light and humidity needs — mosses, ferns, and small tropicals work best — then finish with decorative elements like rocks or bark. Closed terrariums need very little watering since moisture recycles inside the container; open terrariums need slightly more frequent watering and better airflow.
Open vs. Closed Terrariums: Which to Choose
The first real decision is whether your terrarium will have a lid or not, since it changes almost everything else about how you build and maintain it.
- Closed terrariums retain the most humidity and are nearly self-watering once established — ideal for moisture-loving plants like ferns, moss, and tropical foliage. The tradeoff is a higher risk of mold or rot if the balance of moisture and airflow isn’t right.
- Open terrariums lose moisture faster and need more frequent watering, but they’re much more forgiving and work well for a wider range of plants, including some succulents in brighter spots.
If you’re building your first terrarium, an open container is usually the easier starting point — mistakes are less likely to snowball into a moldy mess.
What You’ll Need
- A clear glass container with a flat bottom (with or without a lid) — avoid tinted or frosted glass, which blocks too much light
- Small pebbles or gravel for the drainage layer
- Activated horticultural charcoal
- Well-draining, soilless potting mix
- 2-4 small, slow-growing plants with similar care needs
- Optional: moss, small rocks, driftwood, or other decorative elements
- Long tweezers or chopsticks for placing plants in narrow-necked containers
Choose a container size you can actually reach into — wide, shallow containers are much easier to plant and maintain than narrow-necked bottles, especially for a first attempt.
Step 1: Clean the Container
Wash the container thoroughly with hot, soapy water and rinse well, even if it’s brand new. This removes any residue and reduces the risk of introducing mold or bacteria into a sealed, humid environment right from the start.
Step 2: Add the Drainage Layer
Since terrariums don’t have drainage holes, add a 1 to 2 inch layer of small pebbles or gravel across the bottom. This gives excess water somewhere to go instead of sitting directly against the plant roots.
Step 3: Add the Charcoal Layer
Sprinkle a thin layer of activated horticultural charcoal over the gravel. This helps filter the water that moves through the terrarium and keeps odors and bacterial growth in check — an easy step to skip, but one that makes a real difference over time.
Step 4: Add the Soil
Add 1 to 4 inches of well-draining, soilless potting mix on top of the charcoal, depending on the size of your container and the root depth your plants will need. In larger terrariums, shape the soil into gentle hills and valleys rather than a flat surface — it looks more natural and gives the design more depth.
Step 5: Choose and Place Your Plants
Select plants with matching light and humidity needs — mixing a moisture-loving fern with a succulent that wants dry conditions sets one of them up to fail. Good terrarium candidates include small ferns, moss, baby’s tears, and compact tropicals with detailed foliage.
Small-leaved, patterned plants like Nerve Plant are especially popular for terrariums, since their compact size and colorful vein patterns show up beautifully in a glass container.
Before planting, remove excess soil from each plant’s roots and trim off any yellowed or damaged leaves — a closed terrarium is a favorable environment for disease, so only healthy plants should go in. Arrange taller plants toward the back and lower, spreading plants toward the front, since terrariums are typically viewed from one side.
Step 6: Add Decorative Touches
Once the plants are placed, add any decorative elements — small rocks, pieces of bark, or moss to fill gaps around the base of the plants. Keep decorations simple; too many competing textures and colors can make a small terrarium feel cluttered rather than intentional.
Where to Place Your Terrarium
Terrariums should get bright, indirect light — never direct sunlight. Glass walls magnify the sun’s rays, and direct sun on a closed or tall container can quickly build up enough heat to cook the plants inside. A spot a few feet back from a bright window usually works well.
If natural light in the space is limited, our guide on choosing the best spot for indoor plants covers how to evaluate a room’s light before committing a plant to it.
Watering and Maintenance
- Closed terrariums need very little watering — the moisture cycle inside largely sustains itself. Water sparingly, and only if the soil looks visibly dry.
- Open terrariums dry out faster and need more regular attention, similar to a regular houseplant.
- Open a closed terrarium’s lid occasionally (roughly once a week) to let excess condensation escape and reduce the risk of mold.
- Trim back any plant that starts outgrowing the container to keep the miniature scale intact.
If you’re building an open terrarium and want a reliable way to check moisture without guessing, a small soil moisture meter can help, especially while you’re still learning how quickly your specific container dries out.
Common Mistakes to Avoid
- Skipping the drainage layer. Without it, excess water has nowhere to go and roots can sit in standing moisture.
- Overwatering. Terrariums need far less water than a typical potted plant — when in doubt, it’s better to underwater slightly than flood a sealed container.
- Mixing plants with different needs. A cactus and a fern will never both be happy in the same terrarium.
- Placing it in direct sun. Even a short period of direct sunlight can overheat a closed glass container.
- Overcrowding. A few well-chosen plants look better and last longer than cramming in as many as will fit.
Terrarium Building Checklist
- Choose open or closed based on the plants you want
- Clean the container thoroughly before use
- Add a 1-2 inch drainage layer of gravel
- Add a thin charcoal layer
- Add 1-4 inches of well-draining soil
- Choose plants with matching light and humidity needs
- Arrange taller plants toward the back
- Add simple decorative touches
- Place in bright, indirect light — never direct sun
- Water sparingly and vent closed terrariums occasionally
Final Thoughts on How to Build a Terrarium
A terrarium rewards a little patience at the setup stage with a display that mostly takes care of itself afterward. As the Iowa State University Extension notes, plants with slow growth rates and a tolerance for humidity make the best long-term candidates for a terrarium’s enclosed environment.
Get the layers right, choose plants that actually belong together, and give it the right light — and a well-built terrarium can stay beautiful for months with barely any upkeep.
Read Next
- Nerve Plant: The Tiny Indoor Plant With Painted-Looking Leaves
- How to Choose the Best Spot for Indoor Plants
- Best Soil Moisture Meters for Indoor Plants

Cosmin Stefanoiu is the founder and editor of The Leafy Room, a practical guide focused on indoor plants, plant care, pots and planters, small-space gardening, and thoughtful plant styling.
He creates clear, beginner-friendly editorial guides designed to help readers choose plants, understand everyday care, and make practical decisions for real homes.